White Label Setup
Within a few clicks you will have a fully white labelled reputation management platform. In this guide we will go over all the steps required to white-label your account.

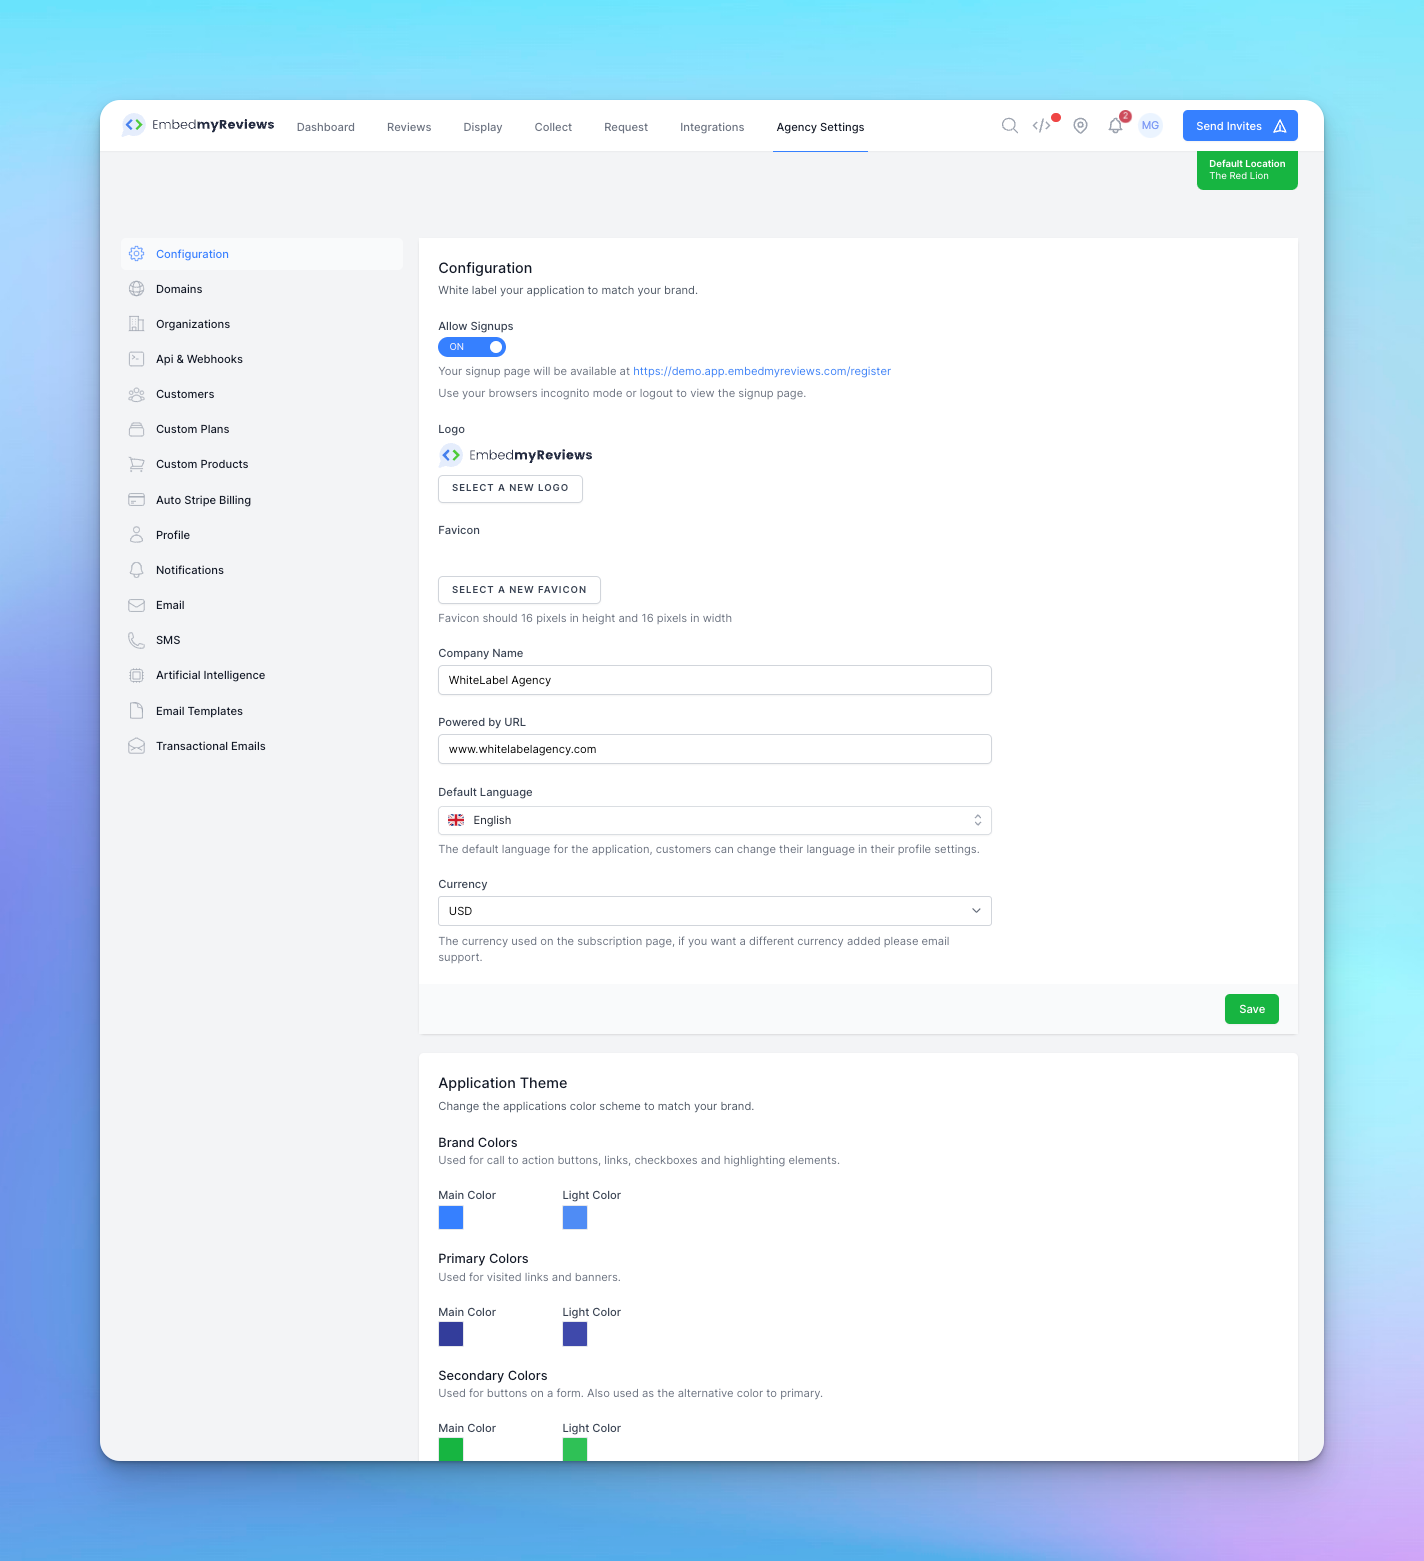
Step 1: Branding
- Click on Agency Settings in the top navigation menu
- Click the configuration menu link in the left sidebar (if not open)
- Under the logo section upload your agencies logo (we recommend an SVG example: see our logo)
- Under the favicon section upload your favicon logo (.ico format)
- Change the company name to your agencies name
- Change the powered by URL to be the domain of your agency or the marketing site you will be using for this platform
- Click save once you are happy with the changes
Step 2: Theme
- Click on Agency Settings in the top navigation menu
- Click the configuration menu link in the left sidebar (if not open)
- Scroll down to the application theme section
- We have three groups of colours the main and light version select the best combination that matches your brand
- Click save once you are happy with the changes
Step 3: Domain
Before getting started make sure you have logged into your DNS service provider account. This will usually be GoDaddy, Cloudflare etc.
If you need help finding your DNS hosting provider click here.
It is not feasible to document the process for every DNS hosting provider so this guide is based on CloudFlare but the steps will be similar on most other DNS hosts. If after following the steps you are still stuck please reach out to support by clicking here.
We also highly recommend most agencies to use a subdomain instead of pointing the domain directly to the platform. So for example if your domain is called: getmorereviews.com then on the main domain (getmorereviews.com) you would host your marketing/landing pages. Your white labelled software would be hosted on a subdomain like: app.getmorereviews.com. It's up to you to decide what the subdomain should be but we recommend to use app as this is norm in the software space.
- Click on Agency Settings in the top navigation menu
- Click the domains menu link in the left sidebar
- Under the "Add Custom Domain" section copy your current subdomain (this will be highlighted in bold)
- Go to your CloudFlare dashboard
- Under the websites section click on the domain you would like to redirect to your software
- In the left sidebar click on DNS
- Click on add record
- Make sure the type selected is CNAME (important)
- In the name field provide the name of your subdomain (for this example we will use app)
- In the target field paste the subdomain you copied from step 3
- With CloudFlare the Proxy status is switched on by default please make sure that is switched off
- Click save
Now let's head back to the domains section in EmbedMyReviews.
- Type your newly created subdomain into the domain input field (for this example it would be app.getmorereviews.com)
- Click save
- Click request certificate on your newly added domain
Great! You have now added your white-labelled domain to your account. Please note you may need to wait a few hours before the DNS changes take affect across the internet. You can test the new subdomain in another tab in your browser if it loads correctly then you can set the domain to primary.
Recommended next steps: How to setup an email provider
